Search This Blog

Thursday, March 28, 2013

Comfort Afghan

 OK gals, I had to share this with you.  My hubby works with Heart Made Blessings http://www.heartmadeblessings.org/
and we just received this COMFORTGHAN to give to a family who just lost their daughter.  I wanted to share it with you not only because of the lovey artisan handcrafted work but because you might enjoy this as its crochet and just another great way to play with lovely yarn.
 These squares are crochet, they are made by individuals all over the United States and each one has a tag on it from the person who made it, where it came from and sometimes a short message.  Each square is different and to understand what its all about you just need to visit the little link I provided above. 
 When the finished blocks are sent in for construction, a carry bag is made to match the color of the comfortghan which is presented to the family and a lovely documentation enclosed.

Normally we see these in patriotic colors for our veterans.  This one is quite different in its colorways and so pretty I had to share it.

Enjoy!


Wednesday, March 27, 2013

Get Well and Recital

Thank you everyone for the super great Get Well Cards and the adorable Pink Cap - I will have to see if wearing this will improve my work!   Still feeling miserable. 

On the upside remember us chatting about the Recital of one of our own OddBalls!
Here is the information, lets show our support and click our needles!

~~~~~
This is all the information about my Senior Recital for the Oddballz :) Thanks for offering to share!

~Megan M. Johnson
Senior Recital
April 4th, 2013
7:30pm
Fine Arts Recital Hall
Southeastern Oklahoma State University
Durant, OK
Free admission

Wednesday, March 20, 2013

Spring Break ~ And Much More

 Another successful transformation from a ball of yarn to a wearable bit of couture.  One down, one to go!  Congratulations.   As the sock came down to the toe decreases the last step was to preform the surgery known as the Kitchener Stitch which locks the top and bottom stitches together to close up the toe.  Detailed images and directions are at the end of this blog.
 With much anticipation we are awaiting this little Red Number to come to completion - none of us know what this scarf pattern looks like, but you know its gonna be HOT!  Baby brushed aplaca! 
 Oh look who is happy, happy, happy!  She turned her heel!  Well, its not all that hard, but those gussets will be more exciting - promise! 
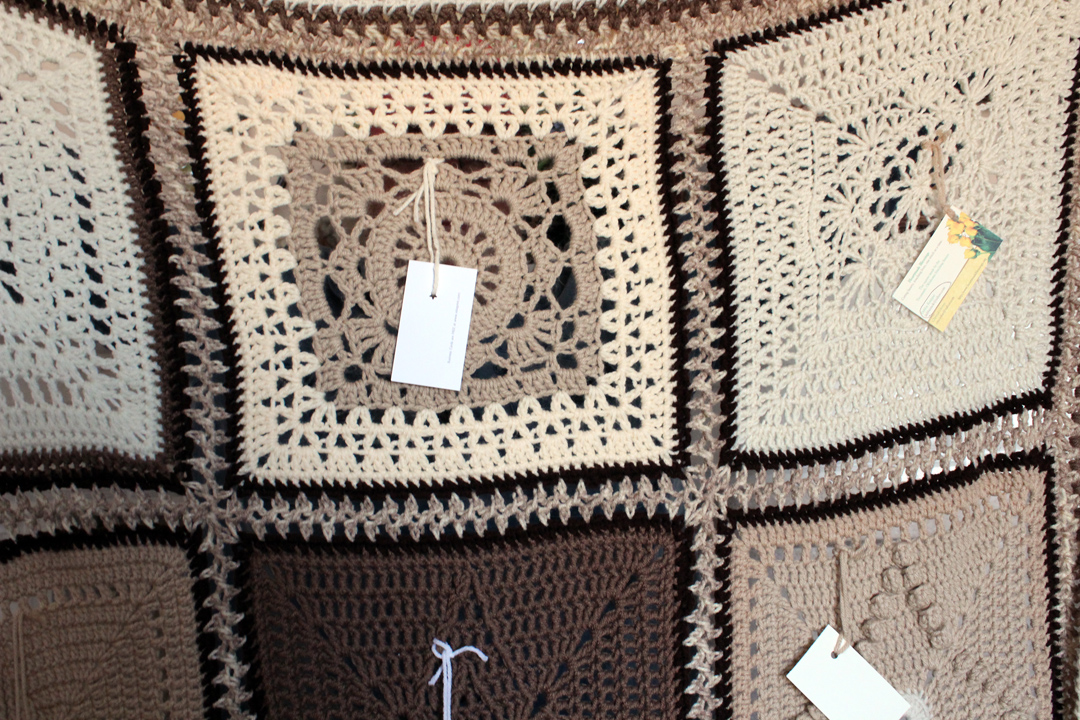
 Another of the fabulous blocks finished for the Heirloom Afghan.  I think this is Lattice pattern.  If not it sure looks like lattice!  Proud Ripley holding her students finished work!
April Block directions at the end of the blog.
 So much concentration, shopping and ball  winding.  Its not spring break in the shop.  Who heard of such a thing, us yarnaholics have never heard of it!
 Fast Sally's Passion Nette from Plymouth Yarn.   The shop has gotten in some of the wildest yarns and cotton's.  This is one of the wild ones, I can't resist a good challenge.  Its an open mesh cotton/acrylic made in Italy, from Plymouth Yarn. Its knitted up like the previous scarves we all have done.  This just makes me want to spend time on the beach.  Ripley has a hank of this in progress too.
Oh we are going to be so sorry to see you moving away, especially after we have nicknamed you SockAndreti.  Last week you cruised across the needles from the start of your sock to the heel turned, and now approaching the toe!    Remember that you can always keep in touch of our activities via the blog!


OK - April is fast approaching - time to Start Your Needles for April Block.  Go ahead and print off your pattern for your notebook, gather your wits and jump in for an exciting new block. 
Cheers:  Fast Sally


Afghan Block of the Month  April  2013

Lattice Stitch

Cast on 61 stitches

________  Row 1:                Right Side:  K4, P5, (K7, P5) 4 times, K4
________  Row 2:   P4, K5, (P7, K5) 4 times, P4
________  Row 3:   K3, P3, K1, P3, (K5, P3, K1, P3) 4 times , K3
________  Row 4:   P3, K3, P1, K3, (P5, K3, P1, K3) 4 times, P3
________  Row 5:   K2, P3, (K3, P3) 9 times, K2
________  Row 6    P2, K3 (P3, K3) 9 times, P2
________  Row 7:   K1 (P3, K5, P3, K1) 5 times
________  Row 8:   P1, (K3, P5, K3, P1) 5 times
________  Row 9:   P3, K7, (P5, K7) 4 times P3
________  Row 10   K3, P7, (K5, P7) 4 times, K3
________  Row 11:  P2, K9, (P3, K9) 4 times P2
________  Row 12   K2, P9, (K3, P9) 4 times K2
________  Row 13:                P3, K7 (P5, K7) 4 times P3
________  Row 14: K3, P7, (K5, P7) 4 times, K3
________  Row 15:  K1 (P3, K5, P3, K1) 5 times
________  Row 16:  P1, (K3, P5, K3, P1) 5 times
________  Row 17:  K2, P3, (K3, P3) 9 times, K2
________  Row 18   P2, K3 (P3, K3) 9 times, P2
________  Row 19:  K3, P3, K1, P3, (K5, P3, K1, P3) 4 times , K3
________  Row 20:  P3, K3, P1, K3, (P5, K3, P1, K3) 4 times, P3
________  Row 21:  K4, P5, (K7, P5) 4 times, K4
________  Row 22   P4, K5, (P7, K5) 4 times, P4
________  Row 23:  K5, P3, (K9, P3) 4 times, K5
________  Row 24   P5, K3 (P9, K3) 4 times, P5.

Repeat rows 1-24 until square measures approximately 12 inches form cast on edge, ending  by working on right side row.  Bind off all stitches leaving last loop on needle. 
Edging:  Drop loop from needle, insert crochet hook in loop. Do not turn; work 3 single crochet in each corner and 48 single crochet evenly spaced across each side.  Join with slip stitch to first single crochet.  Finish off. 


 KITCHENER STITCH TUTORIAL
kitchener1.jpgSTEP BY STEP
Hold the two pieces of knitting parallel to one another with the wrong sides facing. Thread the working yarn with a yarn needle. Note: If the working yarn is not hanging near the needle tips you can use a separate length of coordinating yarn.
kitchener2.jpg*Insert the yarn needle knitwise into the first stitch on the front knitting needle.
kitchener3.jpgDraw through the stitch and slip the stitch off of the front needle.
kitchener4.jpgInsert the yarn needle purlwise into the next stitch on the front knitting needle. Draw through the stitch. Leave the stitch on the needle.
kitchener5.jpgInsert the yarn needle purlwise into the first stitch on the back knitting needle.
kitchener6.jpgDraw through the stitch and slip the stitch off of the back needle.
kitchener7.jpgInsert the yarn needle knitwise into the next stitch on the back knitting needle. Draw through the stitch. Leave the stitch on the needle.
kitchener8.jpgRepeat these steps beginning at the * until all of your stitches have been grafted together. Even out the sewing and weave in the ends.
Garter stitch grafting is performed in a similar fashion. You will begin in the same manner as stockinette by inserting the sewing needle knitwise into the first stich, slipping it off of the front needle and then inserting the sewing needle purlwise into the next stitch (shown in photos 1-4). You will then repeat these steps exactly on the back needle. Continue to repeat these steps, alternating between the front and back knitting needle until all stitches are joined. Even out the sewing and weave in the ends.


Wednesday, March 13, 2013

New Skeins & Block Busters

Those blocks!   My gosh and golly you guys are cranking out the Heirloom afghan blocks left and right.  I love this little purple block, I think its the Feb block called Daisy and I believe this is Jennifer's block.  We need to give her a good nick name, she is young, she is talented and FAST with the needles.  Her tension is spot on and she truly has a nack for this textile work.  There should be a vote next Tues night!  After all she already finished 2 pair of socks with just one short tutorial from me!
 Our great Ripley has been busy getting the Heritage sample blocks knitted up.  You all know who Ripley is, the one who comes over and rips out your stitches and fixes your work!!!  Vicki has a new handle. 
Honestly I tried to take these pictures in order but not quite sure if I have given them the right month.  This cable is April's block.  I know some of these have been started already. 
 This could be a preview of May's block.
 This I think is Elm leaves, and June's block.  Really delicate compared to the cable and the basket weave look.
 Two blocks side by side from the fast hands of one of the knitters.  January's block next to Feb's block.  Hey, once they are blocked they will be the same size! 
 I wish you could see this pretty yarn better, its a slate blue with flecks of turquoise slub.  Its really a pretty look knitted up.
 Our yougest knitter has been getting coached by her gram.  She is knitting a really cool scarf on her own with just the slightest help.  We are all pulling for her to start her first sweater next month.  Joking..
 Pagewood Farms lovely yarn Danali in the color Grasshopper!   Socks again.  I think I will hand my handle over to Jennifer as I do not feel like FAST Sally anymore...more like plodding Sally.  Anyway, this is the most enjoyable sock I have done to date.  Still on the 1st one!
Jennifer was given a challenge by her gram Ripley, if you can knit my scarf, I will gift you some new needles!   The challenge was accepted and we should see a new scarf or shawl next week!  I forget the name of the red designer yarn, but its being knitted up with some soft brushed baby alpaca.  Hot color, hot scarf...really a great one to keep you warm in cold drafts. 

Thats it from your OddBall reporter.
Be sure to check out all the new skeins in the shop!   Cheers ~

Sunday, March 3, 2013

A Sock Loom Anyone!


I now have mouse hand from surfing the internet about different ways to knit socks.  I knew there were sock knitting machines   but those are really expensive.  Does anyone remember the Bond Knitting machine. I know I had one and loved using it and made tons of cool things from my handspun yarns.   I wonder if you can even get one of these old antiques!   Which lead me down another avenue of the little sock looms you hear about.   May this be the answer to all your sock knitting dilemma!

The sock loom idea seems to have many possibilities.

Leisure Arts-Sock Loom BasicsYou tube also offers great information! http://www.youtube.com/watch?v=FS61MXrBg8E   I love this little Wonder Loom as it even has little ridges so your hook needle can easily catch up the yarn to drop it over the upright post.     You guessed it, over at Amazon they have the looms!  KissLooms is a nice place to visit too!
KissLooms   No matter what pattern you can adapt it to these looms.  Personally I think once you learn how to knit a sock that the hand knitting method might be faster but this looks like a lot of fun!

Happy Adventures!

Thursday, February 28, 2013

Sock Pattern My Way from Easy Peasy


ODD BALL SOCKS – Condensed - I took the liberty to re-write our sock pattern so its easier to follow as I guide you.  Please print this out for your knitting bag.

Light worsted weight yarn and size 5 Double Pointed Needles.
Size is for women’s medium size sock.  (if you use different size needles or yarn you might get very tiny socks or ginormous socks!)

CUFF:
Cast on 40 stitches over 4 needles – 10 stitches on each needle.  Do not twist your stitches and attach together knitting K1, P1 around your sock for approx 2 inches – with a nice light worsted weight this is about 25-30 rows.

HEEL FLAP:

Transfer 10 of your stitches onto your working needle.  You will now have 20 stitches on one needle.  This will be your Heel Flap. 
Knit across and purl back.  Knitting on the outside or (RS)  right side of the sock, and purl back on the inside or (WS)wrong side of the sock.

Knit back and forth till you have knitted a total of 20 rows.


TURNING THE HEEL:

This creates the nice little round area for your heel.  Just follow the directions:


(to work the SSK ~ slip slip knit) , you slip one stitch from left needle to the right needle, then you slip another from left needle to right needle, put both back on the left needle and knit them together as one.  Here is a little video.


Row 1:  (RS): K12, SSK, K1
Row 2 : (WS): sl 1, P5, P2tog, P1
Row 3:   sl 1, k6, ssk, k1
Row 4:  sl1, P7, P2tog, p1
Row 5:  sl1, k8, ssk, k1
Row 6:  sl1, p9, p2tog, p1
Row 7:  sl1, k10, ssk
Row 8:  sl1, p10, p2tog
Row 9: Knit across the 12 stitches remaining.

THE GUSSET

      1.   Pick up 20 stitches on this needle from the side of your heel flap.
            *** after the 19th stitch place a marker.
  1. Knit across your next 2 needles .   (each of those have 10 stitches)
You have now ended the k1, p1 cuff so just knit across the next 2 needles.
  1. Pick up 20 stitches on the side of the heel flap using another double pointed needle.  ***place a marker after 1st stitch.

  1. When you finish picking up those 20 stitches you are at the place where you  
Started your heel flap.  Place a locking marker here as this will be the place you count your rows from.
 ***Needle 1 has 32 stitches, Needle 2 has 10 stitches, Needle 3 has 10 stitches and Needle 4 has 20 stitches.   They are not evenly dispersed, you can arrange them if you would like.


DECREASE OF THE GUSSET:
1.     Knit to 2 stitches before your first marker, K2tog, slip marker, Knit to next marker, slip that marker and ssk (refer to the little directions above for Slip,Slip,Knit) and knit to end of round.

REPEAT this decrease round until only 40 stitches remain. Keep your markers in place you will come back to them later.

THE FOOT


Continue knitting in stockinette stitch (just knitting, NO purling) all the way around until the sock comes to the bottom of your big toe.  It’s a good idea to keep track of your rounds so you know how many you knit.  This is reference for the next sock and others to be knitted in the future.     If you try to slip the sock over your foot to measure, be careful you do not break your needles or slip them out of the stitches.  When the sock is stretched out the length will decrease.  Be sure to knit enough rows.
 
THE TOE
Remember that first stitch marker!   Knit over to your first stitch marker.  SLIP THIS MARKER AND KNIT THE NEXT STITCH.  Place your end of round marker here!

Setup round:  K1, pm (place marker), k18, pm, k2, sm (slip marker), k1.  Now all your markers are in place and you are at the end of the round.  Decreases will be worked now.

Round 1:  k1, *sm, k2tog, k to 2 sts before next marker, ssk.  Knit to next marker.  Prpeat from *.  Knit to end of round.

Round 2:  Knit every stitch on all needles to end of round.

Continue working rounds 1 & 2 until 12 stitches remain.

Remove markers, cast off with Kitcheners Stitch and weave in your ends.


The End of fist sock – now do it again!

Sewing Your Blocks Together

This is some great detail for all of you who are working on the Heirloom Afghan BOM.  At some point you are going to want to sew your blocks together.  Your leader found this great informative information just for you!  I especially like that it shows you the RS which is right side and the WS  in the photos.  This will help you as you work on techniques that prompt you to start on  RS or WS. 


This is how to finish sewing your blocks together, which is mostly made up of seaming the squares together. You can use good old mattress stitch, which is my favorite seaming technique for most things, but I'm partial to slip-stitch crochet seaming for seaming afghan squares.

Here's how you do it:

Slip-Stitch Crochet

Spacer 10x10 pixels
 Working the slip-stitch crochet seam
  
With right sides together and working one stitch at a time, insert a crochet hook through both thicknesses into the stitch just below the bound off edge, or one stitch in front of the selvedge edge.

Catch the yarn and draw a loop through both thicknesses, then catch the yarn again and draw this loop through the first. This secures the end stitches together.

*Insert the hook into the next stitch, through both thicknesses, then catch and draw a loop back through both thicknesses and through the loop on the crochet hook; repeat from *, keeping the crochet stitches even. 
 
 
To end, cut the yarn leaving a tail 6–8" (15–20 cm) long. Pull the tail end through the last stitch on the hook. Thread the tail on a tapestry needle and weave it back through the seam allowance for 2" (5 cm).
TIP: Slip-stitch crocheted seams are easy to remove if you've made a mistake—just pull on the working yarn to ravel. Because it's so easily removed, it's ideal for adjusting the placement of matching seams or easing in fullness.